Social Login Setup
In the section we will setup the social login for WooStore Pro application. The application supports
and each of them have their own steps that you need to follow to set them up properly.
Google Login#
In this section we will setup the Google Login feature in the application.
Follow the steps below to setup Google Login for your application.
Android Integration#
Click on the link Google Cloud Platform API manager.
You do need to enable the OAuth APIs.
This link will take you on the Google Cloud Platform Api - OAuth Consent Screen where you will enable a few options to collect user data like email and other public profile information.
In case you have not logged into your Google Account, the link will take you to login screen and will redirect to the desired location once you login.
Make sure OAuth Consent Screen is selected in the left menu.
Select a Project if not already selected from the top bar.
The Firebase Project that you have created in Firebase Setup section will appear here. You need to select that project.
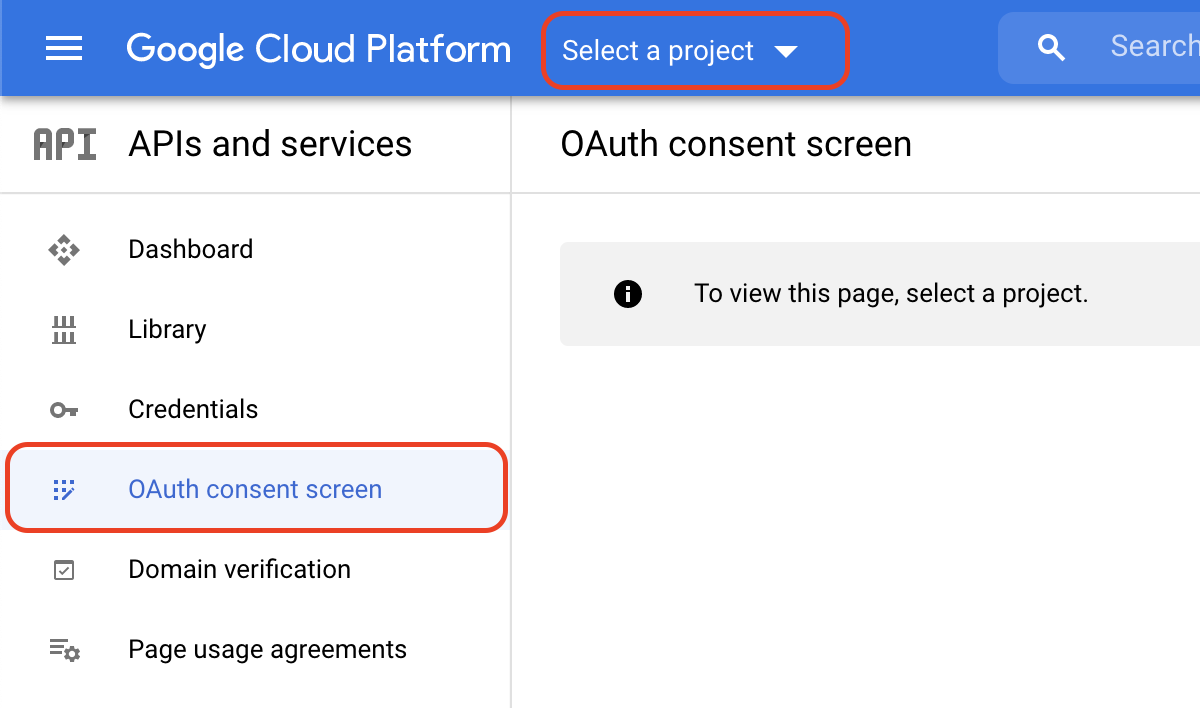
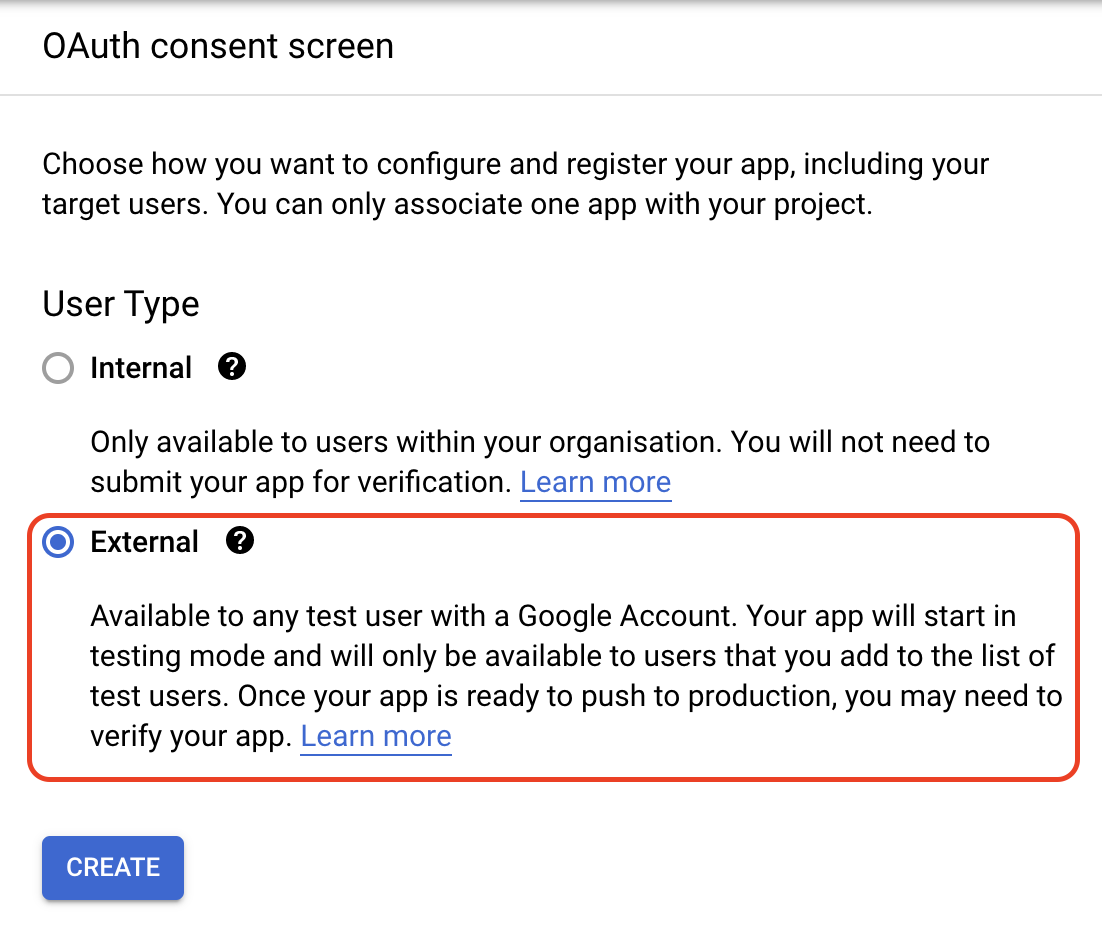
Once you've selected your project select the option External under the section User Type and click on Create
Add the required information under the following sections
App Information
- App name - The name displayed to the users
- User support email
- You can also add an app logo here but adding an app logo may be subject to verification from Google's team.
App Domain
Application home page
Application privacy policy link
Application Terms of Service link
Authorised domains
Most of the times it is already filled with your Firebase Project Hosting Url
Developer contact information
Now click on Save and Continue to move to the next step.
Under Scopes click on Add or Remove Scopes

From the pop up menu select the following scopes:
../auth/userinfo.email
.../auth/userinfo.profile
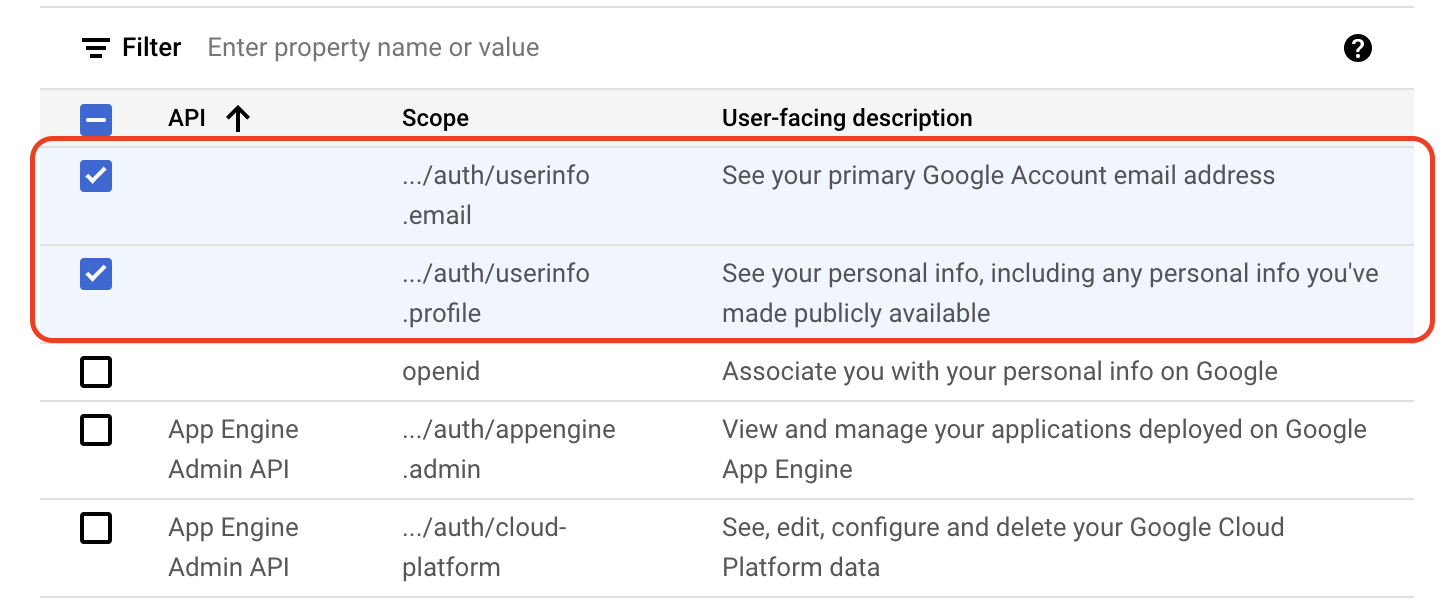
Click on Update at the bottom of the pop up.
Now click on Save and Continue to move to the next step.
For the remaining steps you can add your information or choose to skip them and click on Save and Continue. At the last step you can verify your information and click on Back to dashboard to check your settings on the dashboard.
Now we will add the
SHA-1 Fingerprintsfor your debug and release keystore certificates in your Firebase Android App that you created in Firebase Console - Create Android ApplicationPrerequisite
The following steps assume that you have followed through Creating Release Keys for your application and have
upload_key.keystoreSHA-1 Fingerprints
generated from the previous steps. If you have not generated the above mentioned files and fingerprints please follow them and come back later when you have them at hand.
Go to Firebase Console
Select the project that you created in the Firebase Setup
Open the
Project Settingsby clicking on the Settings Icon from the top left menu.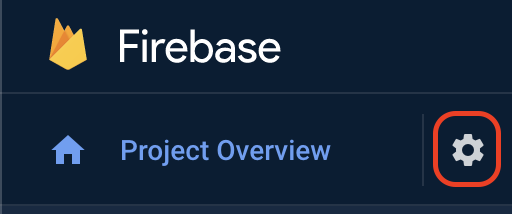
Scroll down to the
Your Appssection and select your app option underAndroid Appsand click onAdd Fingerprintbutton at the bottom.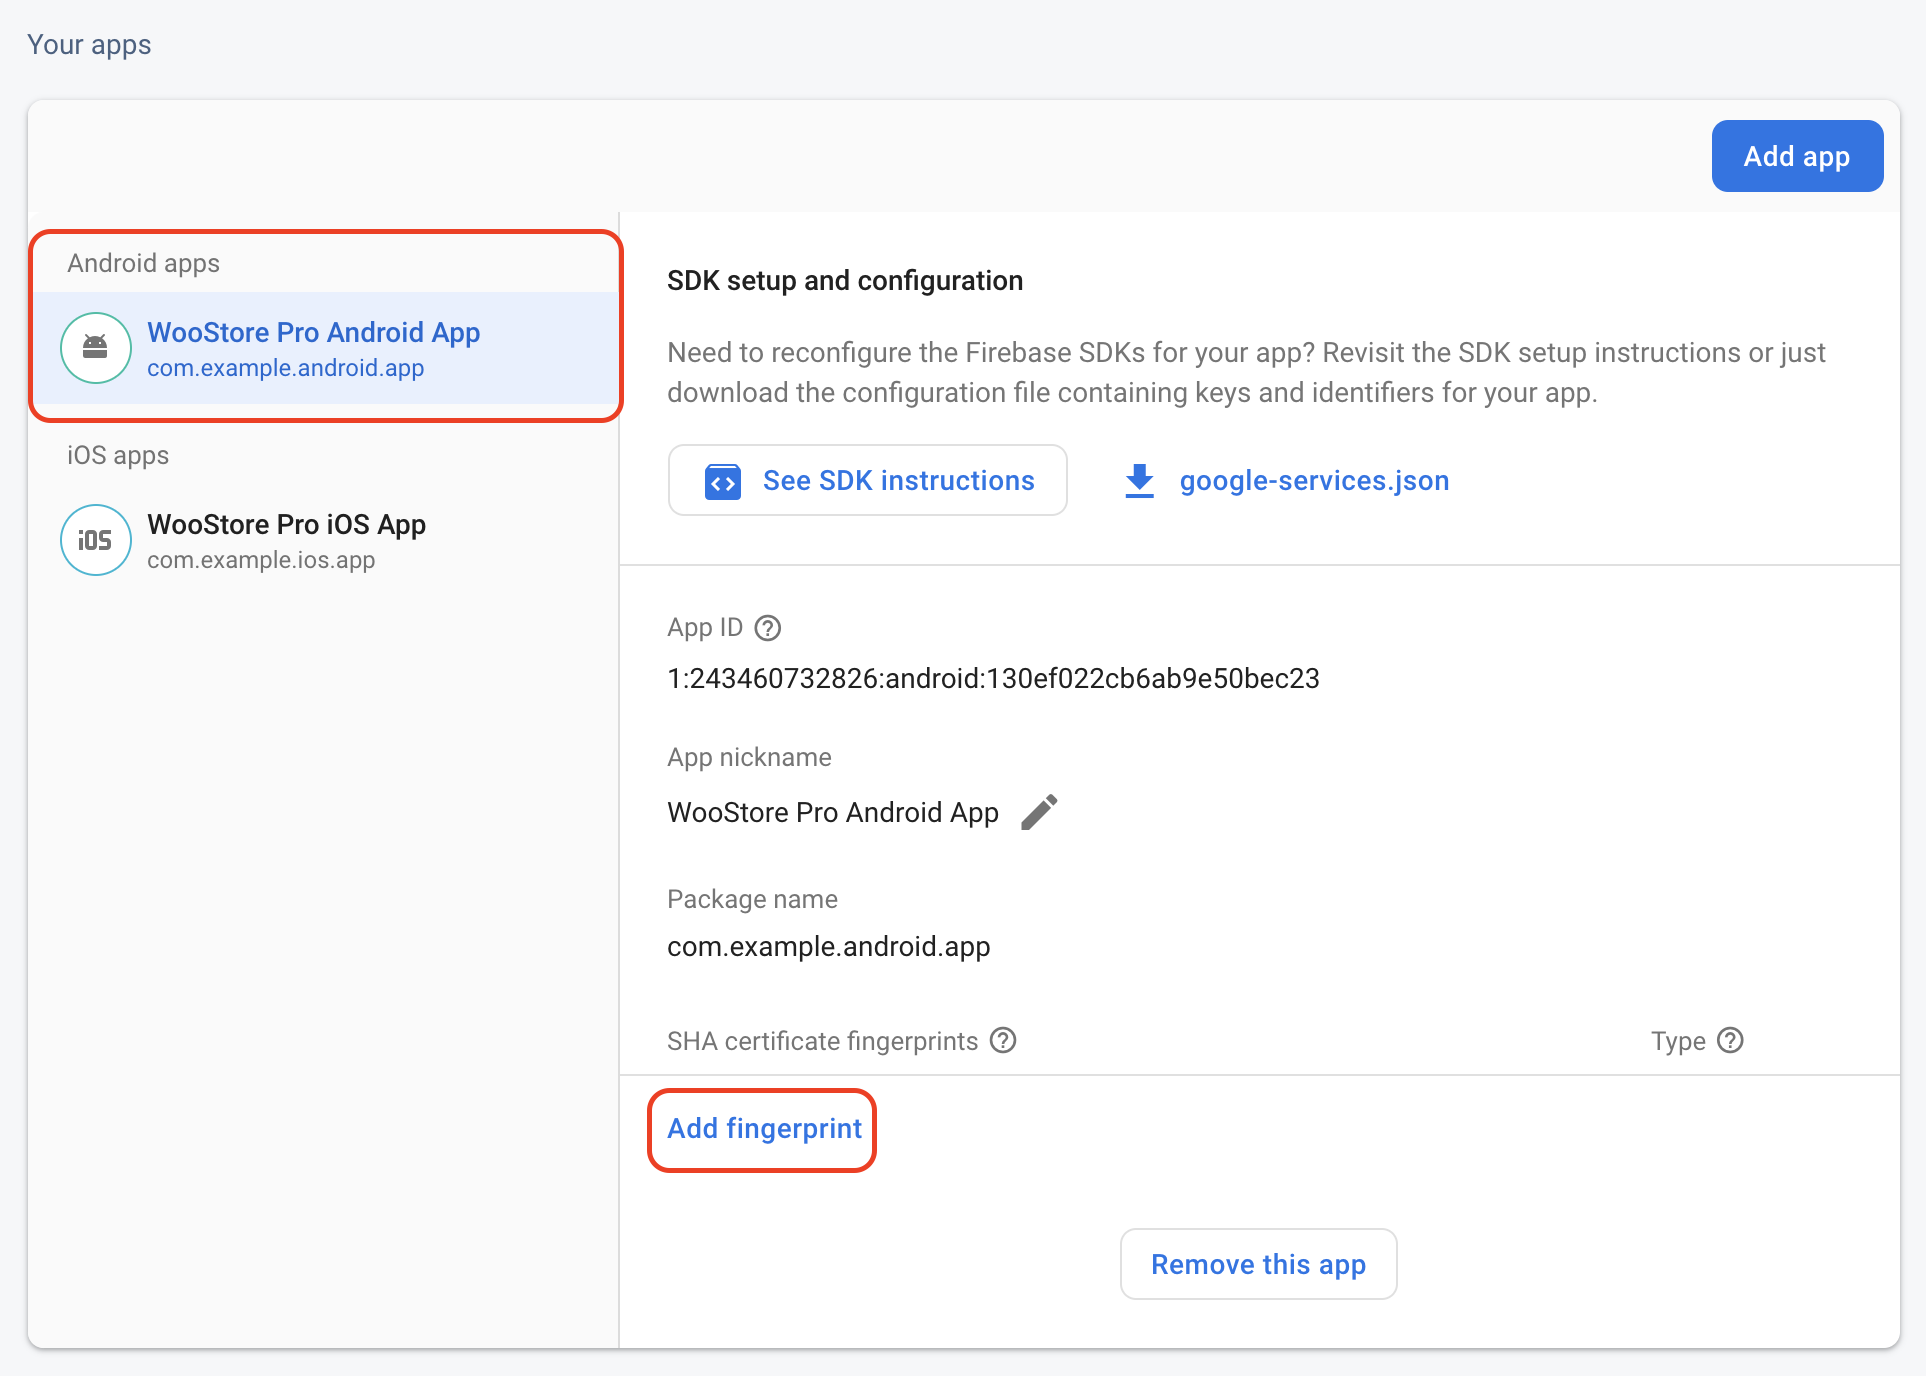
Add both of your
DebugandReleaseSHA-1 Fingerprintsthat you created from the previous steps.
Your Google Login setup for android is now complete.
iOS Integration#
The following section assumes that you have properly followed the Steps 3,4,5 from Create iOS Application under Firebase section
If you've done that please follow along. If you have not done that, please perform those steps and then follow the guide stepwise.
Open
Info.plistandGoogleServices-Info.plistfiles in android studio. These files are located inwoostore_pro / ios / Runnerdirectory.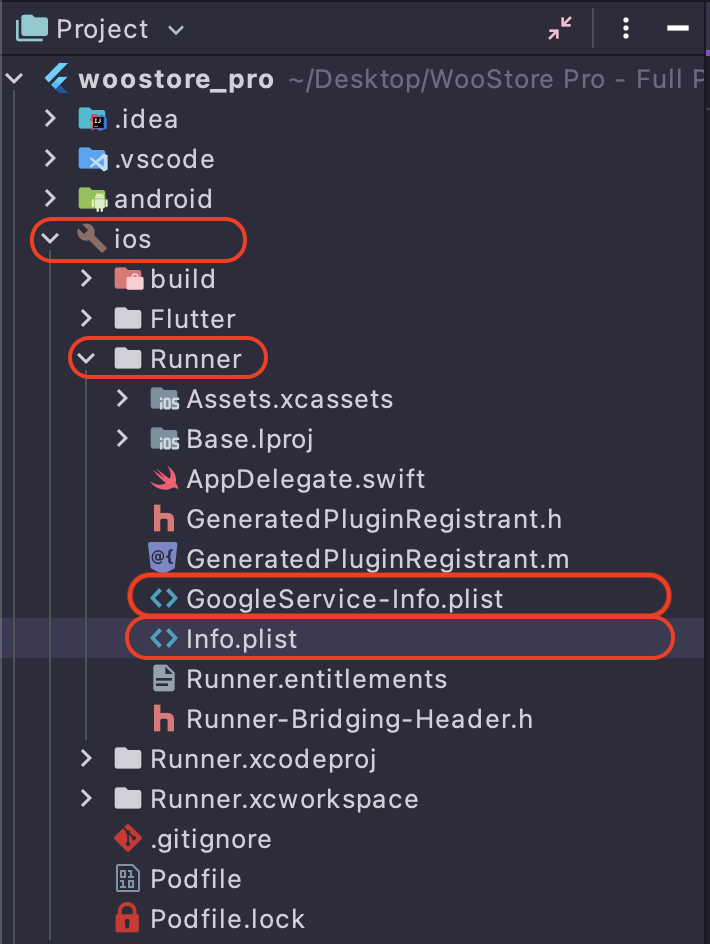
Follow the instructions below
From your
GoogleServices-Info.plistfile copy the value under keyREVERSED_CLIENT_ID. It might be on line number8.
In your
Info.plistfile scroll down to the key namedCFBundleURLTypes. It might be on line number23. You need to replace the value marked underCFBundleURLSchemeswith yourREVERSED_CLIENT_IDwhich you copied from the step above.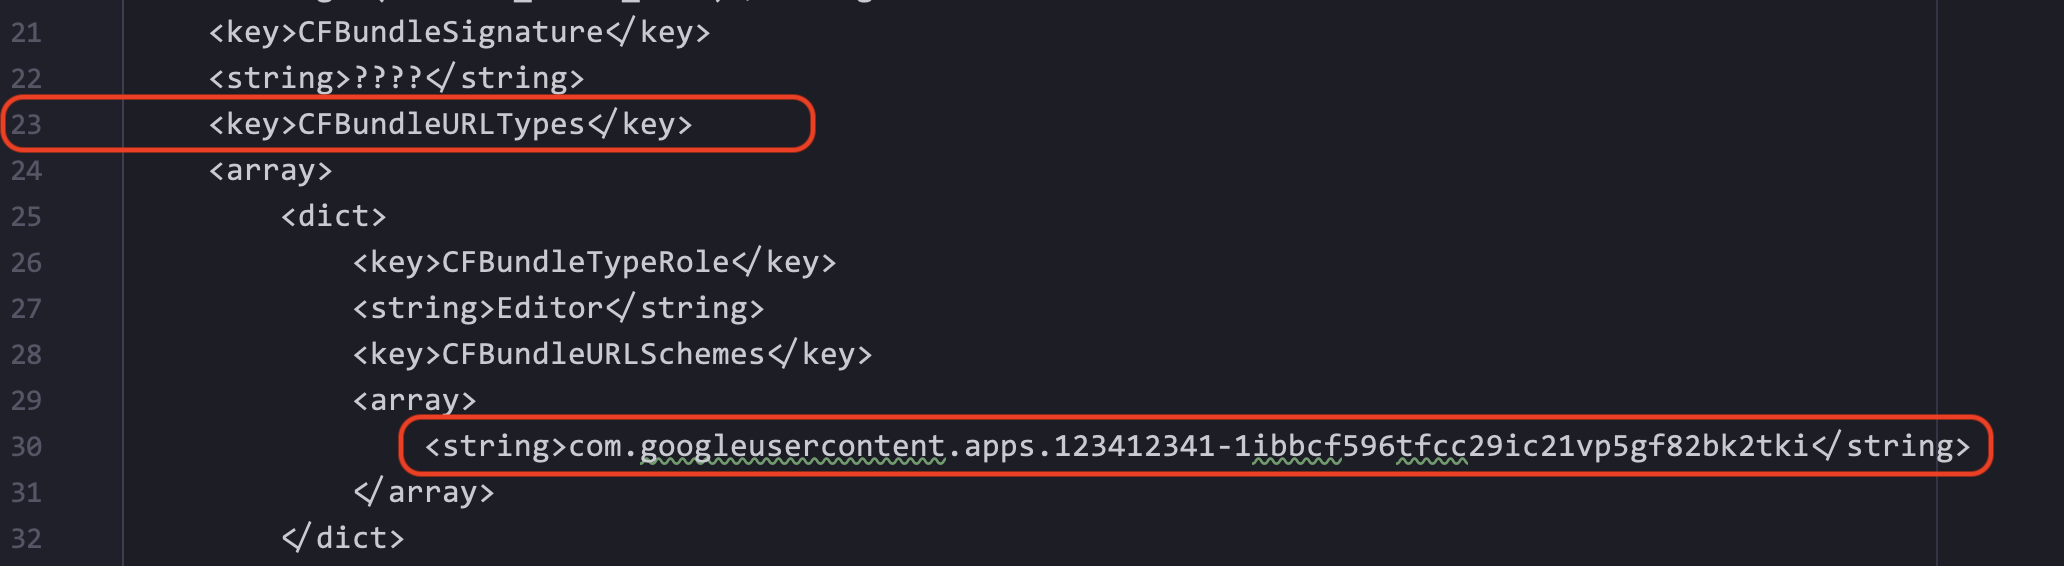
Your iOS Integration for Google Login is complete.
Facebook Login#
Go to Facebook Developers App Dashboard
You will need to sign into your facebook account or create a new facebook developer account.
Click on
Create Appfrom the top right.Select the app type as
Consumerand click onContinuefrom the bottom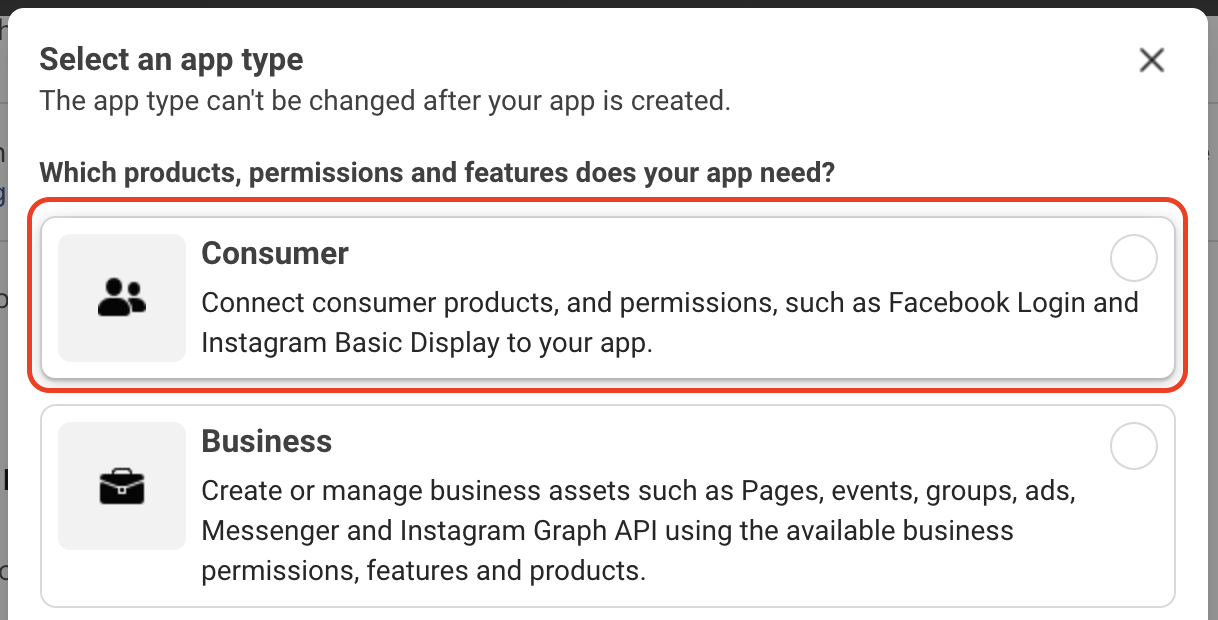
Add the
display nameandcontact email addressfor your app settings and click onCreate App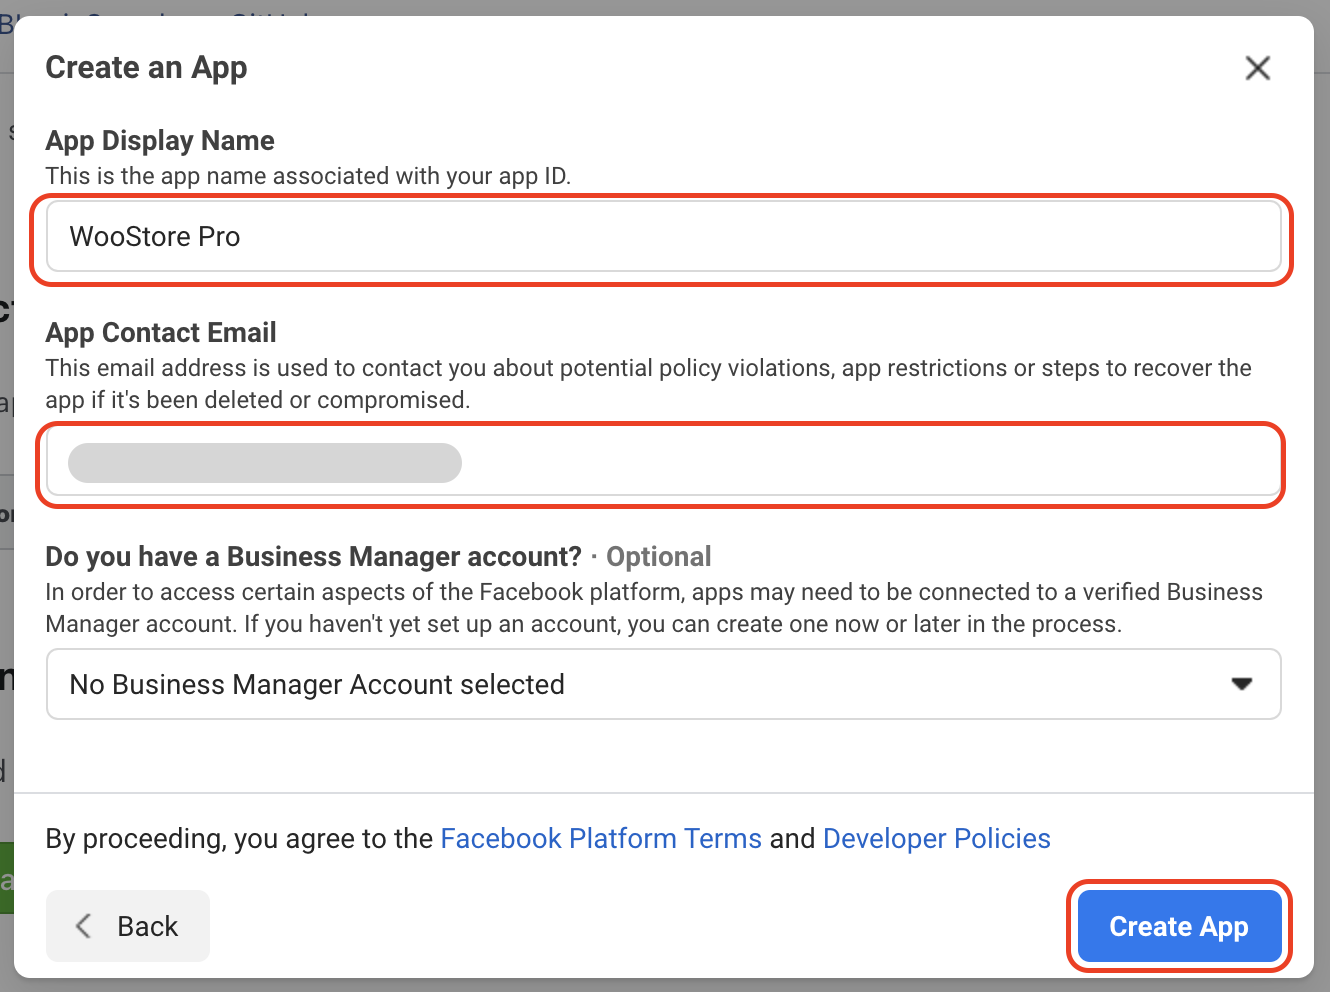
This will create a new app for you and take you to the app dashboard. You can also click on the App entry name to go to the app dashboard.
Android Integration#
In this section we will setup the Facebook login for WooStore Pro android application. You will need to follow the steps below to add specific values for your application Facebook login to work.
Navigate to the
Add Products to Your Appsection by clicking on the (+) icon in-front of theProductheading from the left menu in your dashboard. If you already have an entry namedFacebook Loginthen click on it and selectQuickstart.From Add Products to Your App section select
Facebook Loginand click onSetup.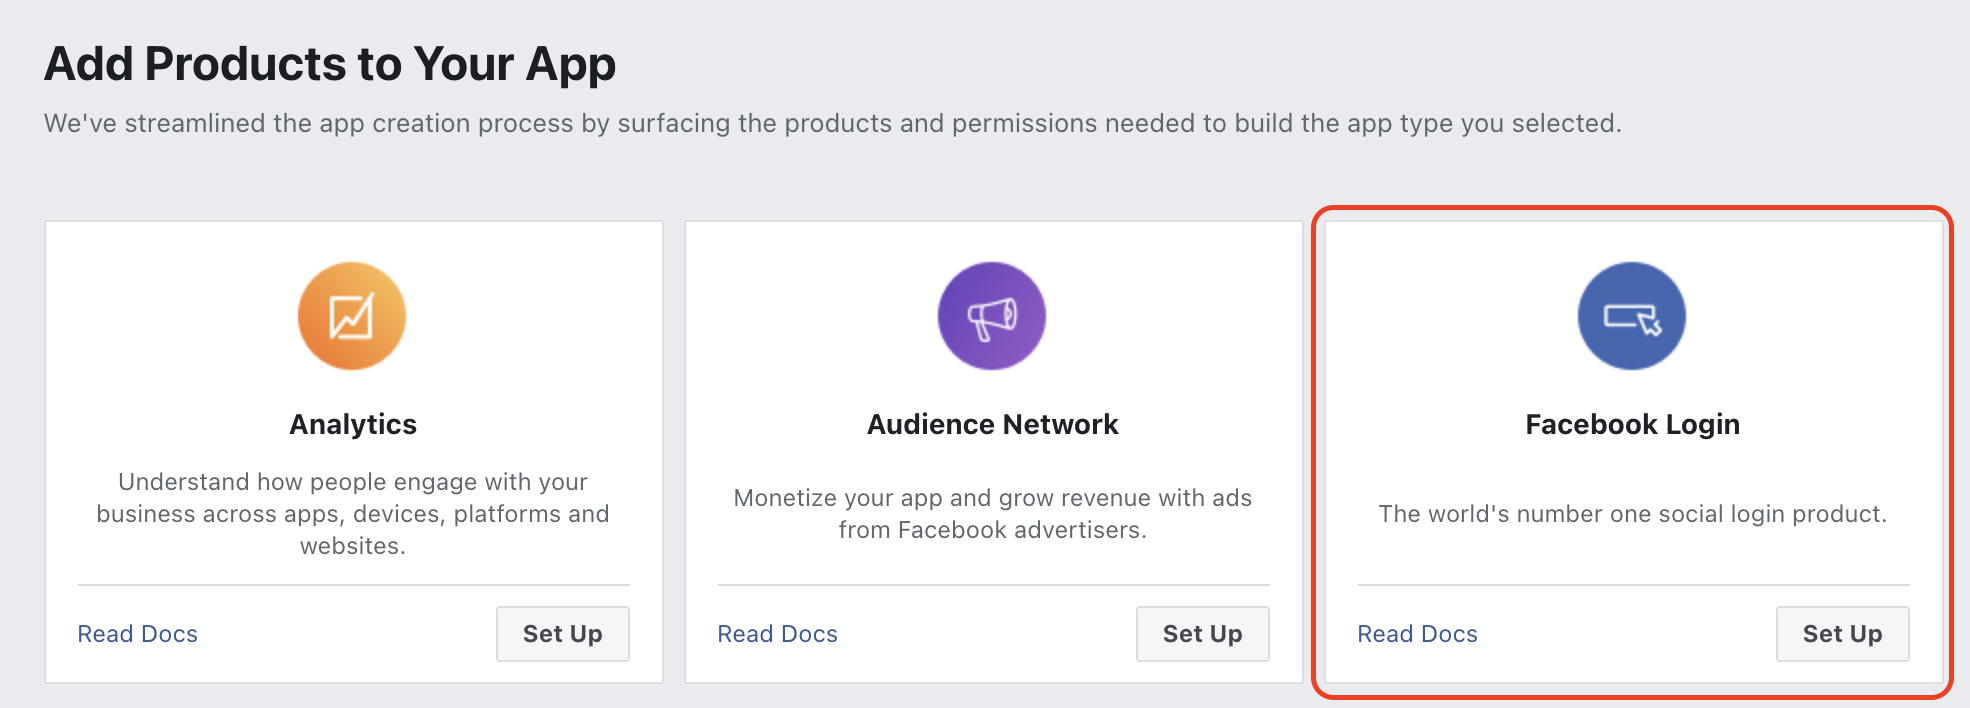
If you do not see the
Facebook Loginoption, please check underProductheading in the left menu as it might already be added to the app. If you already have an entry namedFacebook Loginthen click on it and selectQuickstart.Select the option
Androidfrom the option shown.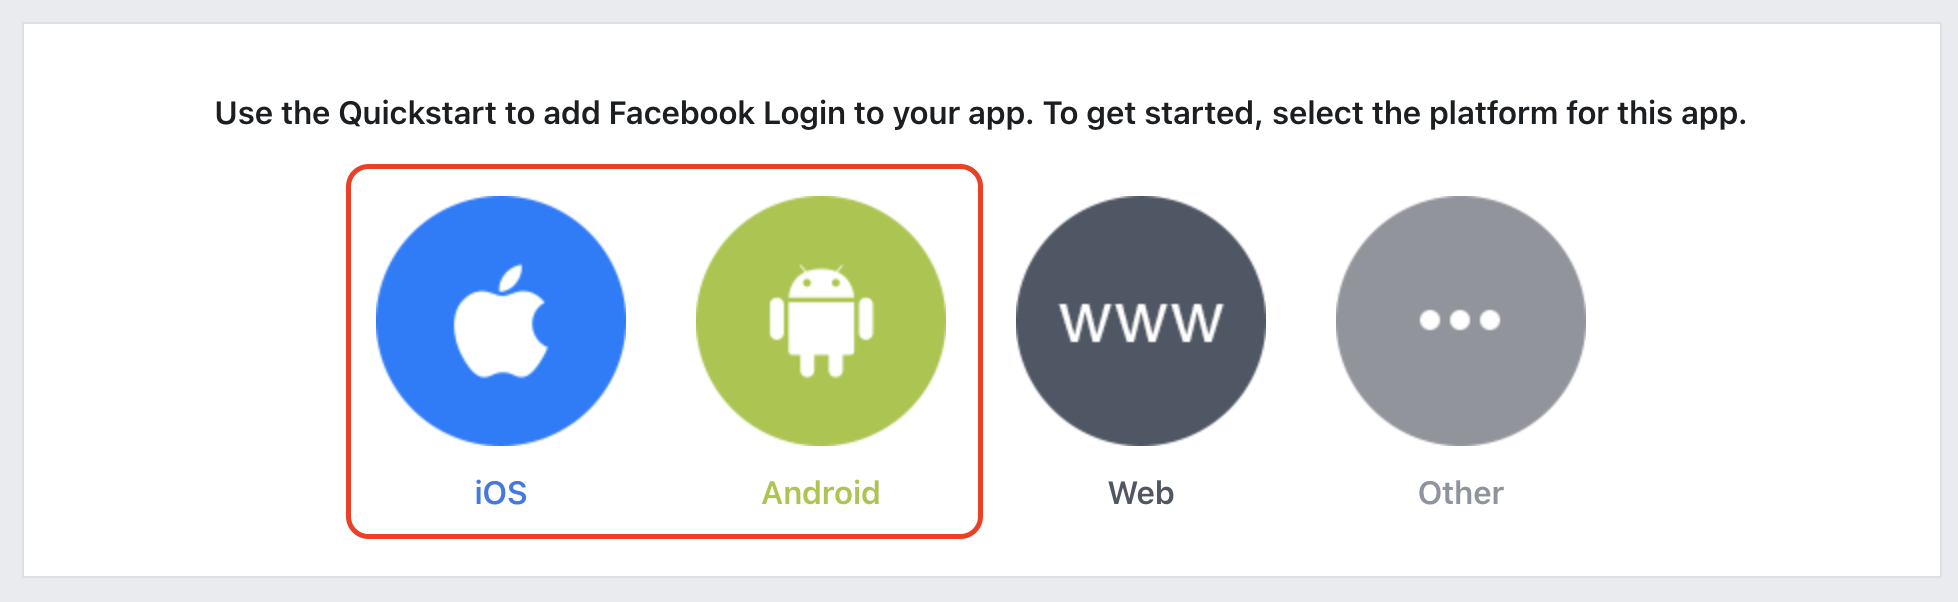
In the setup wizard skip
Steps 1 and 2by clicking onNext.In
Step 3 - Tell Us about Your Android Projectyou will need to add your android app package name.Package NameUnder the
Package Nameadd theBundle Idname you entered while renaming the application in this step: Rename the package. Alternatively you can find this in your Android Manifest or your app's build.gradle file.For example:
com.example.android.appDefault Activity Class NameAdd the
.MainActivityat the end of yourPackage Nameand enter it into this field.For example:
com.example.android.app.MainActivity
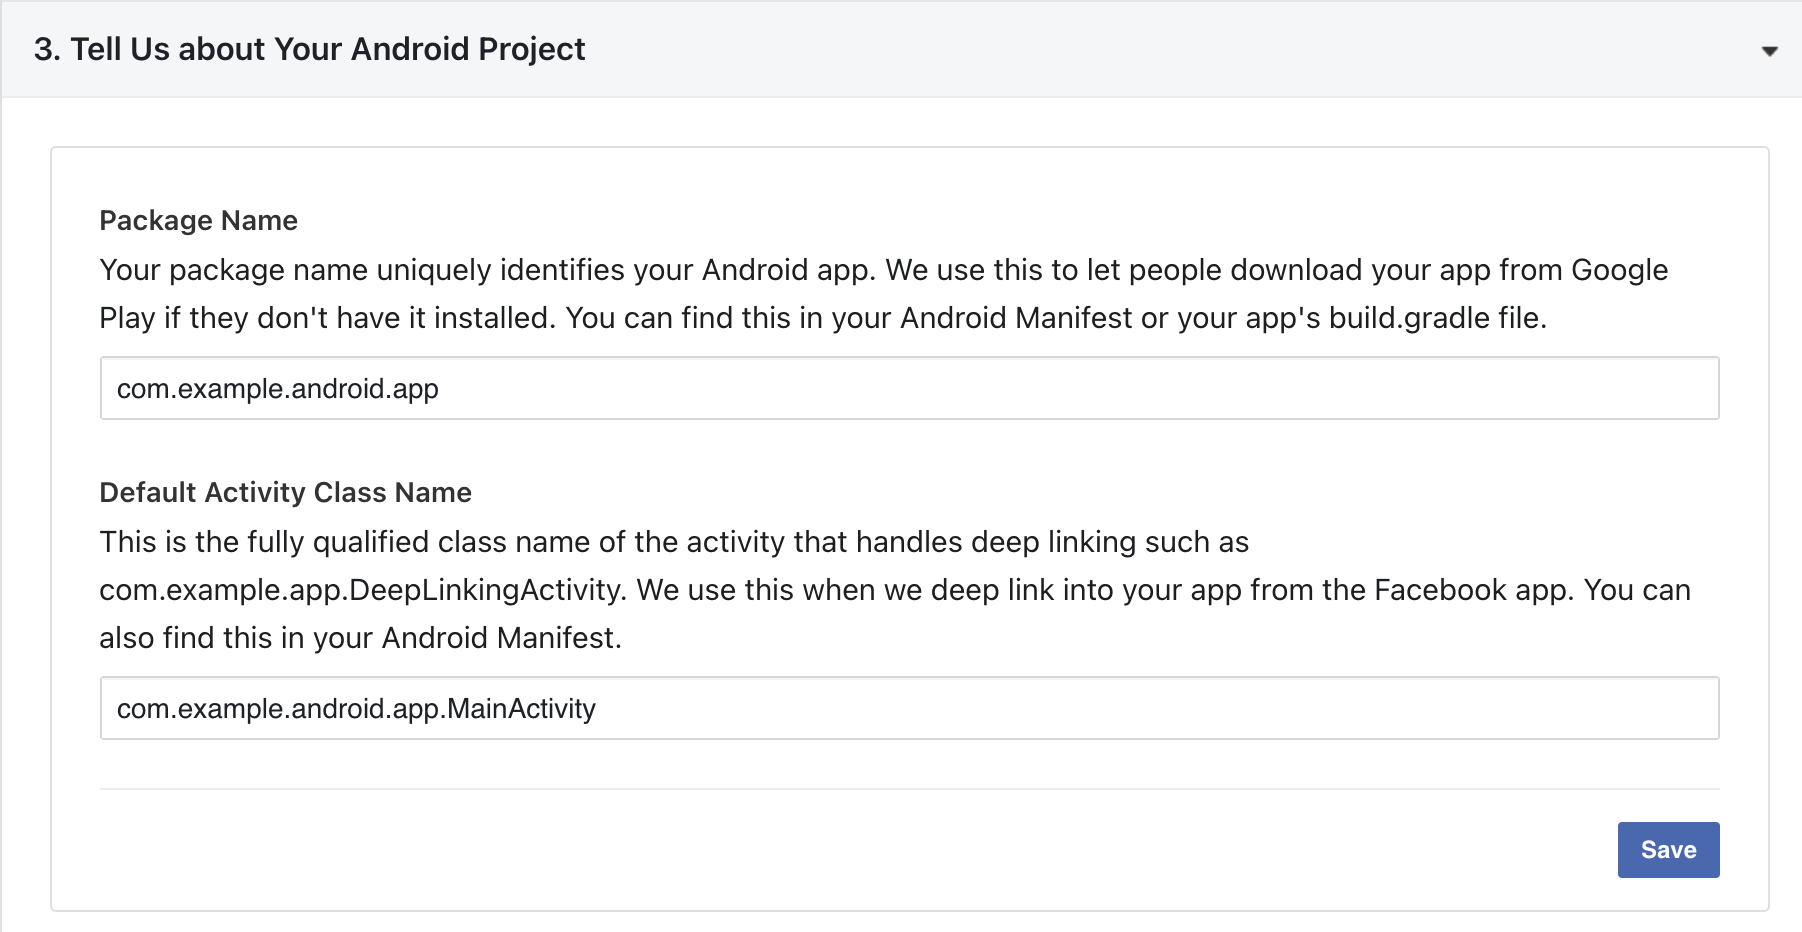
Click on
Saveand then onContinue. If you are prompted with a message that there was a problem verifying package name on Google Play. Please check the package name and try again. Just clickUse this package nameandContinue.In
Step 4 - Add Your Development and Release Key Hashesyou will add your debug and release key hashes which you created in the previous step Creating Key Hashes. Add both your release and debug key hashes here and clickSaveand thenContinue.In
Step 5 - Enable Single Sign On for Your Apptoggle the switch toYesand clickSaveandNext.In
Step 6 - Edit Your Resources and Manifestfollow the steps below.Copy the following from your Facebook Dashboard setup wizard.
Open
strings.xmlin android studio. It is located inwoostore_pro / android / app / src / main / res / values / strings.xmlReplace the values which are already there with your specific values. You can find the information for the above at Getting started with Facebook SDK Android. You might also want to change the app name to your specific Bundle Id value.
Finally
Savethe file by pressingcommand + son MacOS andcontrol + son Windows.
You can skip all other steps as they are already done for you in the application.
Your Facebook Login for Android is now complete.
iOS Integration#
If you have followed the Facebook Login setup for android just now the select the iOS option from the setup wizard at the top tabbar and skip steps 1,2,3 from below. If you are setting up the Facebook Login for iOS first then follow through all the steps.
Navigate to the
Add Products to Your Appsection by clicking on the (+) icon in-front of theProductheading from the left menu in your dashboard. If you already have an entry namedFacebook Loginthen click on it and selectQuickstart.From Add Products to Your App section select
Facebook Loginand click onSetup.If you do not see the
Facebook Loginoption, please check underProductheading in the left menu as it might already be added to the app. If you already have an entry namedFacebook Loginthen click on it and selectQuickstart.Select the option
iOSfrom the option shown.In the setup wizard skip
Steps 1by clicking onNext.In
Step 2 - Add your Bundle Identifieryou will need to add your Bundle Id.Under the
Bundle IDadd theBundle Idname you entered while renaming the application for iOS in this step: Rename the package. Alternatively find your bundle identifier in your Xcode Project's iOS Application Target and paste it into the box below.For example:
com.example.ios.appClick on
SaveandContinue.In
Step 3 - Enable Single Sign On for Your Apptoggle the switch toYesand clickSaveandNext.In
Step 4 - Configure Your info.plistyou will need to edit yourinfo.plistfile.Open the
info.plistfile in android studio. It is located inwoostore_pro / ios / Runner / info.plist.Scroll down to the key value
CFBundleURLSchemes. It is already created for you in the file. The estimated line number is34.Replace the value that starts with
fb959564XXXXXXXX4(on estimated line number36) with your specific value from the Facebook dashboard. The value equals tofb{APP_ID}.In <string> in the key
FacebookAppID, replaceAPP_IDwith your App ID. (on estimated line number52)In <string> in the key
FacebookClientToken, replaceCLIENT-TOKENwith the value found under Settings > Advanced > Client Token in your App Dashboard. (on estimated line number54)In <string> in the key
FacebookDisplayName, replaceAPP_NAMEwith the name of your app. (on estimated line number56)Finally
Savethe file by pressingcommand + son MacOS andcontrol + son Windows.
You can skip all other steps as they are already done for you in the application.
Your Facebook Login for iOS is now complete.
Apple Login#
Perform this setup only if you are releasing the application for iOS as Apple Login is not enabled on Android application.
Apple sign in different from the above two sign in methods. Please follow the steps mentioned below to set up Apple sign in with the application.
Prerequisites#
Before you can start integrating (or even testing) Sign in with Apple you need a paid membership to the Apple Developer Program. Sign in with Apple is one of the restricted services which is not available for free with just an Apple ID (source).
Setup#
Register an App ID#
If you don't have one yet, create a new one at https://developer.apple.com/account/resources/identifiers/list/bundleId following these steps:
Click
Register an App IDIn the wizard select
App IDs, clickContinueSet the
DescriptionandBundle ID, and select theSign In with Apple capability. Use the sameBundle IDas you used while changing the name from here Rename the packageUsually the default setting of
Enable as a primary App IDshould suffice here. If you ship multiple apps that should all share the same Apple ID credentials for your users, please consult the Apple documentation on how to best set these up.Click
Continue, and then clickRegisterto finish the creation of the App ID.
In case you already have an existing App ID that you want to use with Sign in with Apple:
Open that App ID from the list
Check the
Sign in with ApplecapabilityClick
Save
Firebase Authentication for Apple#
After this is done you need to enable the Apple Sign In method provider in your Firebase Authentication module. Follow the steps below to do so.
Go to Firebase Console.
Select the project you created.
Select
Authenticationoption from the left side menu. Click onGet startedif it prompts you.Select
Sign-in methodfrom the top tabbarUnder the heading
Sign in providerssearch forAppleEnablethe option.To complete setup, add the
authorisation callback URLto your app configuration in theApple Developer Console.Perform any additional steps required if mentioned in the firebase authentication area.
Phone OTP Login#
Go to Firebase Console.
Select the project you created.
Select
Authenticationoption from the left side menu. Click onGet startedif it prompts you.Select
Sign-in methodfrom the top tabbarUnder the heading
Sign in providerssearch forPhoneEnablethe option.